Hemi-Gadget Design Project
T
The Hemi-Gadget Design Project was created to engage 7th graders in design thinking. To teach students about the Empathize stage of design thinking, I wanted them to investigate a group of people very unlike themselves. I wanted them to be in a mental place where they had little frame of reference and, consequently, few pre-conceived ideas.
STEP 1: Empathize
In teams of 3, they started by drafting interview questions and then interviewing an older adult who suffered a massive stroke at 45. They spent a pretty intense 35-40 minutes. Afterward, in response to my question "What did you learn?" they said:
"Everything is so much harder for a hemiplegic person."
"I feel so lucky to have the use of both of my hands."
"I've never thought about having a brain injury before."
"I can think of a lot of things that we can build to help hemiplegic people." [Yes! [fist pump]}

Step 2: Research
They then conducted research using websites and videos to learn more about the life of a hemiplegic person - both children and adults. They asked about people in their own family and circle of family friends to find people who are hemiplegic and discovered many different paths, varied ages, and many, many different needs.
In teams, they focused in on a user and that user's need to draft a team Purpose Statement.
Next Step: Ideate
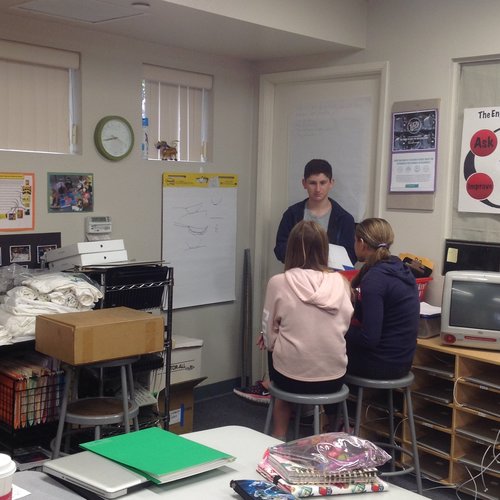
They used the Individual Ideation and then Group Ideation process to address their user's need in accordance with their Purpose Statement. You see the teams here sharing out their best ideas and getting input from their teammates.
I've shared the Design Workbook I created for this project. This is the first time for this project so there will undoubtedly be changes in the Workbook coming up. If you use this Workbook, please share your improvements.
You will see that I've used the Stanford d-School Design Thinking process throughout, as well as many of their teaching graphics. They get better all the time!
(The Workbook is in two pieces because of the website file-size limitation.)

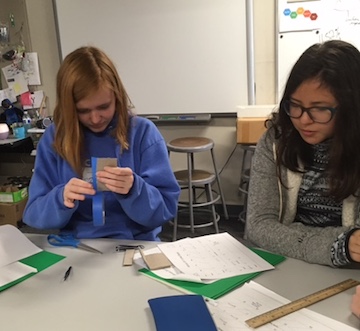
IDEATE More
You see teams sharing their ideas and improving them with team input. This team is talking about grooming gadgets. How does a hemiplegic person put on nail polish?
It was terrific seeing the students work together like this!


Prototyping started today!

These students had never worked with cardboard before and cardboard is my #1 pick for prototyping. It gave me an opportunity to teach students about safely using a cutting blade (Exacto Blade? Box cutter?) and to reiterate The One Line rule. (These students learned The One Line Rule last year in woodworking. Before we cut anything, we need to draw a line. It should be one line, drawn with a sharp pencil and a ruler. It should not be a sketched line or a free-hand-drawn line or a "oh, I changed my mind" line.)
Some items, of course, cannot be prototyped in cardboard but everyone did their best in making the prototyping work. Tianne and Bethani (along with Daniel and Umair) are creating a grooming gadget that will help a hemiplegic person cut and file their nails. Because nail clippers did not lend themselves to cardboard prototyping, they went right to the real thing but built the platform out of cardboard.
HemiGadget Mixing Bowls
Don't you hate it when you're trying to use your mixing bowls and they wobble away with the mixing process? We hate it, too! That's why we designed a set of mixing bowls that will stay absolutely still while you do all the mixing you want in them.
Team MaggieLaurenRyan tested their design this morning! They designed a set of mixing bowls that don't move around the table when you are stirring in them. The test was with pancake mix (so we ate pancakes in class today! Bowls worked great!
(We discovered a minor design flaw when washing the bowls later. They ultimately tried 4 different types of glue.)
Cooking and eating with one hand was a great exercise to remind students what we are all doing here. It helped us get back to the core of our project.
Eating pancakes in class inspired the other teams to complete their projects.

The Bowl Clamp
Garrett, Isabella and Vivian developed The Bowl Clamp to address that scampering-bowl problem. They found most of their materials in the "Future City Models Recycled" bin so you see here that their build surface used to be a city road layout. I'm not sure where the purple bowl came from (maybe the Mars Colony City?). The pine that they used for their gadget came from last year's toy-making project so... in effect....this gadget cost $0.
It securely holds several sizes of bowls by changing the depth of the clamp.

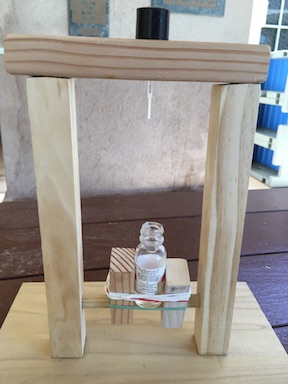
Hemi-Polish
Olivia, Jake and Sammy did not give up on their plan to create a gadget to help a hemiplegic person apply nail polish. This iteration allows for different bottle sizes and shapes and it allows the bottle to be tipped/tilted so the user can get the polish out of the very bottom of the bottle.

After dipping the brush in the polish and wiping the extra off the lip of the bottle, simply put the top and brush through the hole in the top of the gadget. This will hold the brush steady as you move your finger under it, applying the polish.
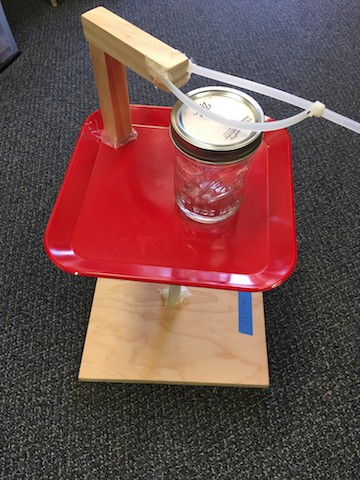
This kitchen gadget (Aidan, Kayla, Caryn) raises the bottle or jar to make it more convenient for the user. Then it uses a releasable zip-tie to hold the jar's lid while the user turns the jar to unscrew the lid. The original design had a telescoping arm to accommodate different sizes/heights of jars and bottles.